How to install and use Sky Digital Key (AverMedia A867 USB DVB-T device) on Windows and Linux computers.
Sky Digital Key is an USB DVB-T tuner designed to be used with this provider's satellite receivers. There are two variants, one with green LED and the other with blue LED, the last being an AverMedia device with Maxlinear MxL5007T tuner and Afatech AF9035 USB demodulator.
The DVB-T key can be installed on PC too. However the driver installation is not quite straightforward. The device is a copy of AverMedia
AverTV Volar HD Nano with two small differences: there is no remote control sensor on Sky key although the PCB has the pads for it and USB IDs are different for the two devices. This aspect makes drivers installation difficult.
This article will describe the installation procedure on Linux and Windows. The USB tuner can be used to receive DVB-T signals with BDA compatible software on Windows (such as ProgDVB) and Kaffeine on Linux.
 |
| AverMedia A867 - Sky Digital Key |
Windows
To install this device on Windows, get the AverTV Volar HD Nano
Windows drivers and install them. Do not waste your time to install the default TV viewer application, because it does not detect the device. All you need is the driver to be able to use any other application like VLC, ProgDVB, SmartDVB etc.
 |
| AverMedia A867 driver installation |
Launch the corresponding driver installation file and wait for the driver to install. Plug in the USB key if you didn't. Open
Device Manager and locate
A867 device. Although you install the drivers, they will not apply to this device because of different device IDs. While AverMedia A867R device has
Product ID = 1867, Sky Digital Key has
Product ID = A867. You could edit the driver file and change this ID, but you will lose digital signature of the driver. So, the best way is to force the driver installation.
Right click
A867 in
Device Manager, go to
Driver tab and click
Update Driver button. Select
Browse my computer for driver software, then
Let me pick from a list of device drivers on my computer. In the list that appears select
Sound, video and game controllers and click
Next.
Locate
AverMedia TECHNOLOGIES, Inc. and look for
AverMedia A867 USB DVB-T device. If you can't find it, click
Have Disk and browse to
C:\Program Files\AverMedia\AverMedia A867 USB DVB-T folder. Select
AVer1867_AVerIR_OBM.inf file. Click
OK. Now you will have the device in the list.
 |
| Select driver |
Click
Next then
Yes in the warning message that appears. Windows will also install InfraRed drivers for this device. That is OK. The USB tuner is now working and usable. I've successfully used it with
ProgDVB software.
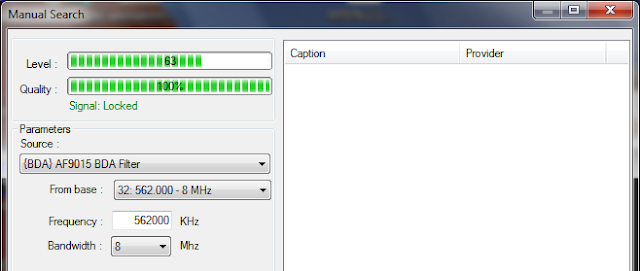 |
| ProgDVB Manual search |
Linux
The good part on Linux is that the kernel already comes with a module for this device:
dvb_usb_af9035. The problem is that, in order to work, AF9035 demodulator needs a firmware that is transferred to it via USB. The Windows driver automatically does that when you plug the device. Linux module would also do the same, yet there are two kind of issues that may arise. Plug in the USB tuner, open a terminal and run
dmesg. Look at the end of the log, where it will display debug messages about the newest kernel activity - a new USB device plugged in.
Wrong firmware
I've seen this on Ubuntu 16.04 LTS. The kernel was trying to download the firmware for IT9135 into AF9035 - the devices are similar and work with the same kernel module, yet the firmwares don't match. If this is the case, you will see in the
dmesg log that the firmware couldn't be downloaded because of a checksum mismatch. Rename the existing firmware and follow instructions from
No firmware section.
sudo mv /lib/firmware/dvb-usb-it9135-02.fw /lib/firmware/dvb-usb-it9135-02.fw.bak
No firmware
On Ubuntu 16.10 things changed. The updated kernel with new module tries to load the correct firmware. The problem is that firmware does not exist.
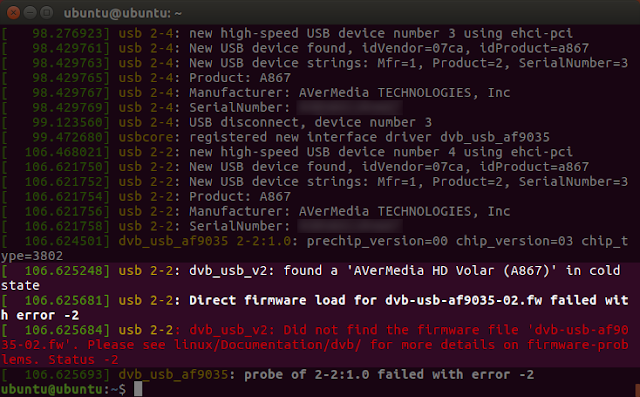 |
| dmesg log showing no firmware found |
You can download firmware from Antti Palosaari
website. There are multiple firmwares available. Run the command below in the terminal to download and copy firmware to
/lib/firmware folder.
sudo wget -O /lib/firmware/dvb-usb-af9035-02.fw http://palosaari.fi/linux/v4l-dvb/firmware/af9035/dvb-usb-af9035-02.fw_3735d499d945a6bb873a7f3ad5c701fa_12.13.15.0_6.20.15.0
Unplug and replug the USB tuner. The blue LED should light up. You should now see something similar to (initially the device is in cold state, then the firmware is downloaded and the device switches to warm state):
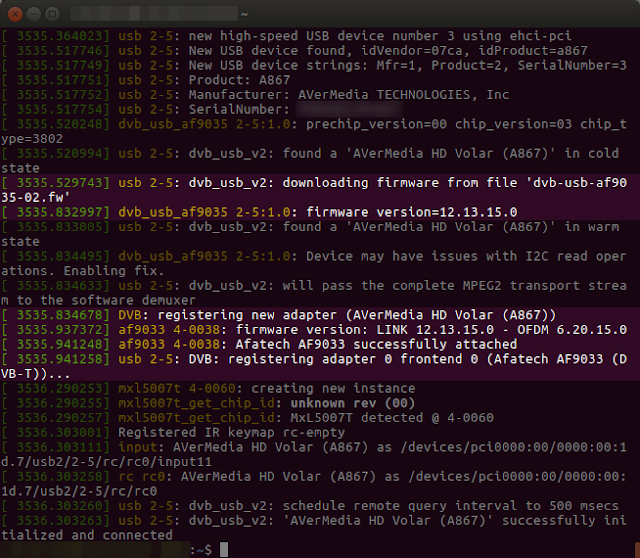 |
| Firmware succesfully downloaded |
The tuner is now ready to use. One simple application is
Kaffeine. Launch it, select
Digital TV. Go to
Television menu and choose
Configure Television. Depending on the DVB devices connected to your PC, a new tab will appear in that window. You will recognize it by the name:
Afatech AF9033. Select
Autoscan source and click OK.
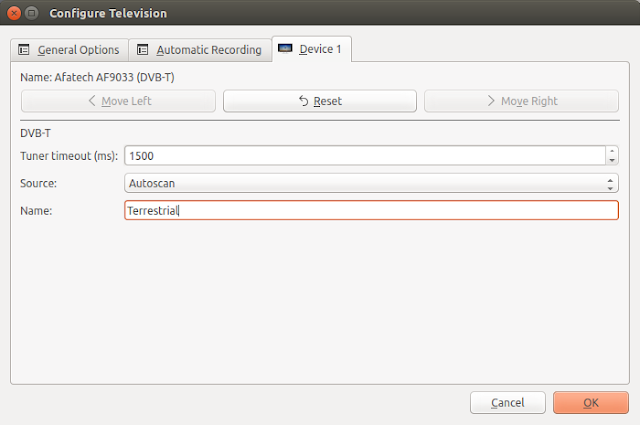 |
| Kaffeine Configure TV |
Now, go to
Television menu and choose
Channels. You can scan the entire frequency band by clicking
Start Scan. After you finish scanning, you can view signal on tuned transponder (channel) and rescan it if you want.
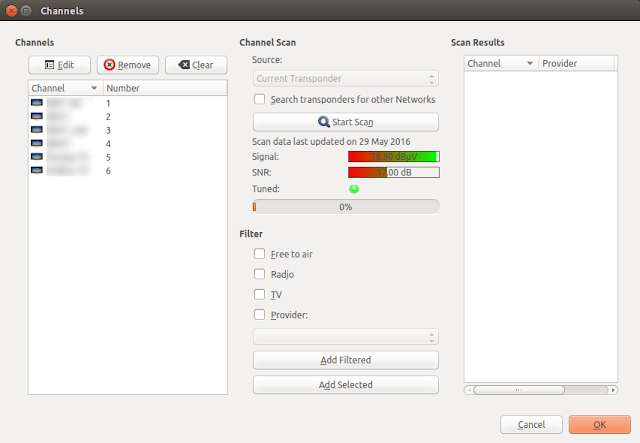 |
| Kaffeine view signal and scan channels |
You can also use VLC to watch TV on both operating systems. The disadvantage is that there is no signal indicator and no channel search function.


AVER
ReplyDeleteDo you have instructions to get the green LED one going?
ReplyDeleteNo. As far as I know, that one uses a different chip for USB and DVB-T, so it requires other drivers.
DeleteUsing windows 11, when I try to install the driver i receive the message "the specified folder does not contain a driver compatible to the device". Pity...
ReplyDeleteMagnifico, la spiegazione per Linux è semplicemente perfetta. Grazie
ReplyDelete