How you can add dynamic header and/or footer to a PDF document using Linux and free software. Works for page numbers, chapters and section markers. Or anything else you want, no matter if it's identical on all pages or different on each page.
sudo apt-get install scribus pdftk pdfchain gimpFirst of all you need to gather some information about the document you want to add content to. Using your favorite PDF reader or any other PDF information software find out the number of pages and their size. In order to know where to place headers/footers pick a content representative page from the PDF document that you will later use as a template to avoid overlaying header/footer with document contents.
 |
| Document information needed here |
- Open GIMP. Go to File - Open. Choose the PDF document.
- Choose the page that best represents the contents layout and click Import.
- Go to File and choose Export As. Change file extension from pdf to png and click Export (twice).
- Close GIMP. Choose not to save if asked so.
 |
| Import PDF document page in GIMP |
Now we have enough information to launch Scribus. Here we will create a document with the same page number and size as the source PDF. It may also be a good idea to set margins to 0 so you won't be bothered by those guides.
 |
| Create new document in Scribus |
Now go to Edit menu and choose Master Pages. A small window appears and whenever it shows, whatever you add to the page displayed will be added to all document pages that the master page applies to. For the rest of this tutorial I will use a single master page that will apply to all pages of the resulting document. However if you want different left/right layout you must use two master pages. How to do that is described in Scribus tutorials. Here is one: Adding Master Pages to Scribus.
I will start by adding a image to the master page, yes that very image I extracted from PDF. Make sure the Edit Master Pages window is visible and the right page is selected (Normal if there is only one). These are the steps:
- Insert an image frame from the Insert menu or main toolbar.
- Double click on it and choose that image exported from GIMP.
- Bring up the Properties window from Windows menu.
- Make sure the image frame is selected.
- Set X-Pos and Y-Pos to 0.
- Set Width to page width and Height to page height (yes, the same dimensions as the source PDF document and the Scribus document). After you did this, the image frame should extend to the entire page and the contained image should fit perfectly. If not, right-click the image frame and choose Adjust Image to Frame.
- It's a good idea to lock the image frame too.
 |
| Image frame properties |
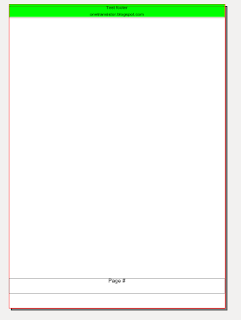
Now, it's the time to add whatever you wanted to add. Header and/or footer, page number (in a text frame - Insert - Character - Page Number). Align them in order not to overlap the contents of the image. Use the Properties dialog to tweak what you add. When you're done, delete the image frame with the page image (after you unlock it). This is how my header and footer looks like:
 |
| Content master page |
All you have to do is close the Edit Master Pages window. You should now be able to browse through your header/footer only document in Scribus. If it is OK, go to File - Export and choose Save as PDF. Do not make any change in the Pre press tab of the export dialog because you risk modifying the output document page size. Close Scribus.
You should have two PDF documents: the initial document you want header/footer added to and the Scribus generated PDF that contains only the header/footer. Both should have the same page number and size. We'll stamp the first with the second using PDF Chain. Make sure the input document is not encrypted! It is very important that Use multiple pages is checked.
 |
| Stamp with PDF Chain |
That is all. Here is a page from my document.
 |
| Document with page number and header |
The overall size of the PDF increased in my case by about 0.5 MB.


Thank you! I've searched all morning on this subject. Did it success on Debian 10 Kde.
ReplyDeleteCan it right off crop the pages on through similar way?
ReplyDeleteUse utilities from 6 PDF page cropping tools for Linux to crop pages of PDF.
DeleteThank you for sharing your knowledge. Works perfectly on Ubuntu 20.04.
ReplyDeleteThanks for sharing!
ReplyDelete